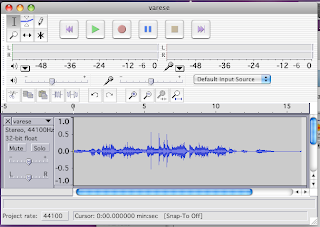
 With this animation I first had to cut up the music, which would allow me make my animation easier. I did this by using Audacity. I first opened the original music within Audacity, I then found my section of music, I then selected it and I cut it out of the original, I did this by pressing Apple+X on the keyboard (which is a short cut for Cut). I created a new file for me to paste the section of music into. I then exported it as an .wav, which is a format that After Effects can work with.
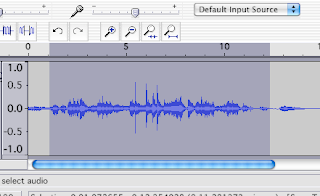 Here the section of music I selected for my third animation, and using the wavelengths I will be able to figure out the points, which I will need to make object move.
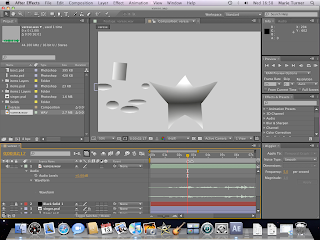 I first made my objects in Illustrator, this is because I wanted to have gradients on them, this is so I can make this animation seem like an older version of the other animations, (by using greyscale and black and white, like old films). I first began with the star in the middle of my screen, emulating a singer or something similar. To create the movements from my storyborad in After Effects, I had to use the Puppet tool.
 The puppet tool allowed me to pin down the points I did not want to move and I did want to move. I started by pinning down each of the points of the star. I then dragged the 2 side points upwards, as well as moving the slider to the point at which I wanted the star to move to.
I made sure that I moved the star to the sounds of the trumpets, so that it would make it look like the star was make the trumpet sounds.
I used the Wiggler again for this animation, this is so at the time when the maraca sounds were played the straight line across the screen would vibrate, which in turn would make the balls that were on it, at the beginning, roll off and create the drumming sounds. However, instead of making both balls bounce I thought that instead I would make the smaller one bounce to the faint drum beat after the bigger one fell like a connonball. And making the bigger one like a cannonball will mean that the audience could tell the difference in the sounds.
I did have trouble with what I was going to do in the middle of my music where there were many different sounds, mainly because I couldn't think of a simple yet interesting way to pull it off. I then thought of objects falling on top of each other creating something like a totem pole, and so to everything sound (which in the end turned out to be about 7 sounds), I had objects falling and then landing on top of the last object that fell.
I then used the straight line to push of the top 2 blocks, in time with the music.
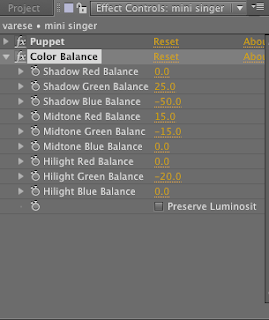 After having created my star I decided to create a duplicate star, which at the end will steal the spotlight from the bigger star. However, I found that to begin with having to 2 stars the same colour didn't make the second one stand out as much as I would like, therefore thought that I could change the colours or tones of the second star to make it stand out.
 This is the tools at which helped me change the colours. I chose the colour that I did because in older films, tey started in black and white and then started changing to a bronzey sort of colour.


No comments:
Post a Comment